
BTS: My Halloween Posts
- Hannah Applequist

- Nov 1, 2019
- 3 min read
Updated: Feb 13, 2020


I hope you all had a wonderful and safe Halloween! You guys LOVED these edits, so I thought I would share a little about my process to the end results! I have had so much fun getting creative with both shoots and costumes.
Ghost Shoot
I didn't plan this out, so everything that I used and wore for the shoot was stuff I had in my closet already! I knew I wanted to do something spooky the day before Halloween, so I pulled a ghost costume together last minute and got permission to shoot at the old Masonic Temple in Salina.
Inspo:


For my makeup/inspiration, I found these pictures on Pinterest of some creepy, but still tasteful, makeup looks. I based my look off of the first picture, even similarly using the bobby pins, lining them all around my head.
Outfit:
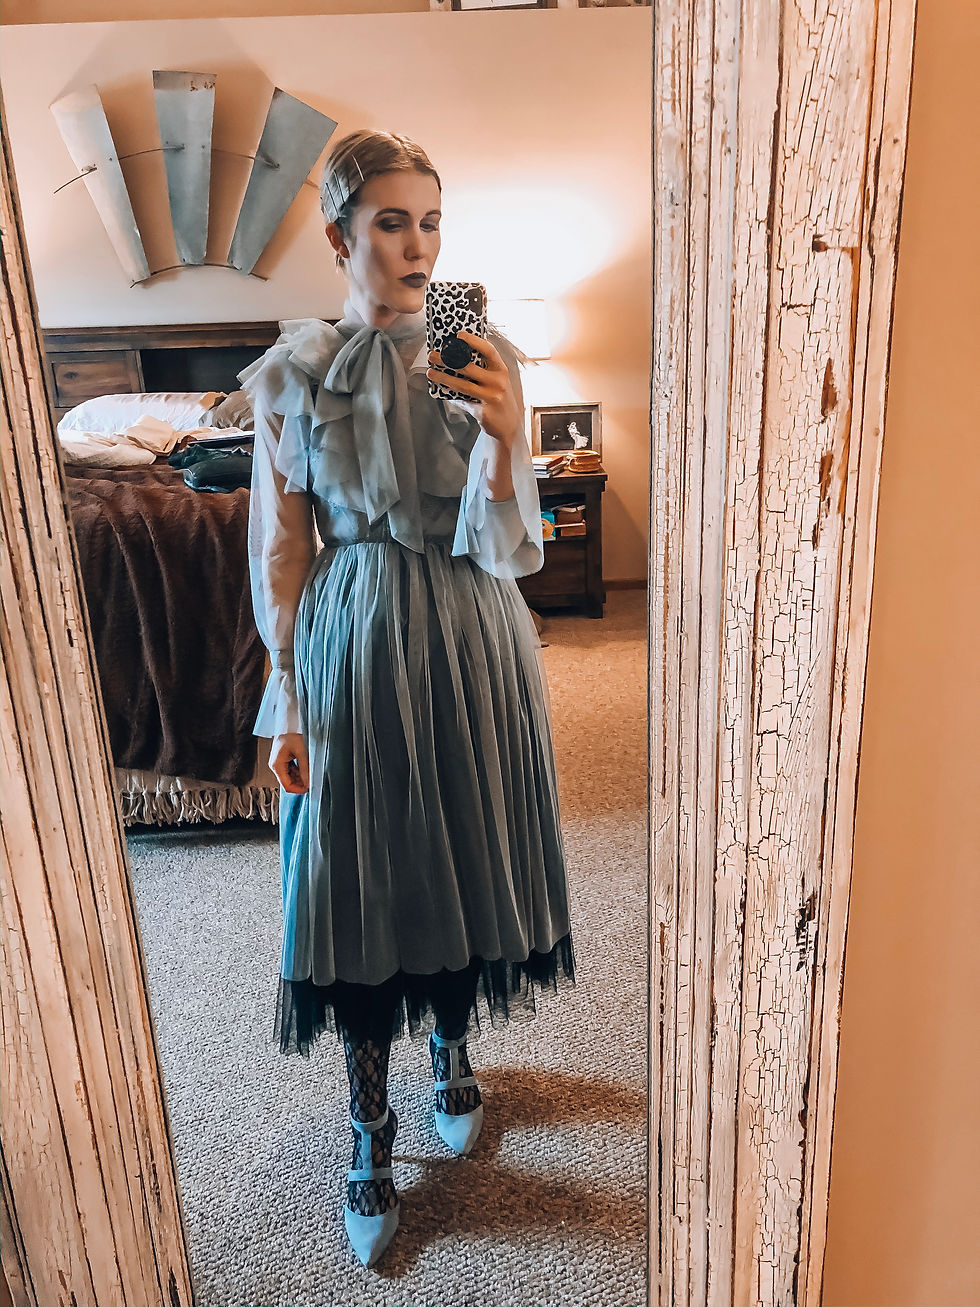
For the outfit, I wore a Chicwish dress and layered a black, tulle skirt underneath for added volume and a spookier look. Gus thought I looked more like a fairy without it.
Click HERE to shop the look!
Edit:

For the original shot, I jumped in the air while holding my dress at a certain angle for it to be flattering. The light was pretty dim in the room, but we used a battery powered LED panel light to light my front.

For the first part of the edit, I used an indoor preset. I edit all of my pictures using the Adobe Lightroom mobile app and presets that I adjust to make my own. I modified the preset by adjusting the brightness to make it a little darker/spookier, and brought out the blue tones in the color of the picture to highlight the color of the dress and give my skin tone a pale look. I also used a vignette to fade the edges of the picture.

For the second part of the edit, I used the selective editing option available on the Lightroom app to highlight just me. I then turned the saturation way down to take all of the color out. The next step was using the Dehaze option and turning that down as well to create a blurred and smooth look.

For the last step, I used a really neat app that I discovered only recently through a fellow blogger, called Procreate Pocket. This app allows you to use many different settings to draw on your pictures! I used an Apple Pencil on my iPad to edit this. I selected the option "nebula" and changed the color to a white/grey. I then lightly pressed the pencil where I wanted the effect to be placed and, tada!
Witch Shoot


I wanted to use clothing out of my closet for both Halloween posts, and this one was extremely easy! I wanted to just blend into the darkness, so I wore all black, head to toe. The hardest part was trying to figure out my idea of either having a crystal ball or some sort of spell shooting out from my hands into the darkness. That's when I had the idea to use fairy lights! I had a small, round, glass vase at my studio that worked great for the crystal ball/light orb and just pushed the fairy lights inside. I fed the battery pack down my sleeve to hide it, and held the opening to the vase out of view from the camera.
Edit:

This was the picture that we started with. We went out in the woods behind our house when it was very dark (super scary lol!) and brought the same battery powered LED lights with us that we used in the first shoot. One light was placed behind me where you can't see it and the other was placed in front of me.

This is the first edit. I used an Adobe Lightroom preset again to change the coloring and sharpen the picture. I also adjusted color and brightness levels a little bit.

For the stars, I found the perfect setting on the Procreate Pocket app, and placed each individual star where I wanted it using my finger or apple pen! This app also responds to the pressure of your touch, so the harder you press, the brighter the effect appears. That is how I got the different sizes of stars, and also some clusters!
I hope you enjoyed this behind the scenes, now please enjoy some more pictures from both shoots below!


Comments